Setting Up Local Sync
By C.Du @snail123815 & Joost Willemse @Karivtan
Web interface uploads usually have a file size limit and can time out for large files or a large number of small files. It also depends on the stability of your internet connection and the stability of your browser. Once stopped, you have to start over from the beginning.
Therefore, we recommend using the Nextcloud desktop client to access Research Drive files on your local computer. This allows you to work with your data directly from your file explorer (Windows Explorer or macOS Finder).
The “virtual files” feature of modern OS is supported in Nextcloud desktop sync, which allows you to see all your files in Explorer/Finder without taking up local storage space until you open them. You can also choose to make files available for offline access.
Install Nextcloud desktop client
For University Computer, please find Nextcloud desktop client in the Company Portal (Windows 11) or Managed Software Centre (macOS). For personal computer, you can download “Nextcloud Files” application from the Nextcloud website. There is also Linux version available.
University Mac users
I have confirmed with ISSC that the Nextcloud from Managed Software Centre is already “Virtual files” version. However, it is still possible that the client may not be correct after update. If that is the case, please contact the ISSC helpdesk to request an update to the Nextcloud client with “Virtual files” support. This feature is important for efficient storage management and seamless access to Research Drive files on your local machine.
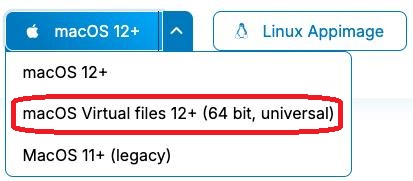
Personal Mac users
Please make sure to select “Virtual files” desktop client to download, for example “macOS Virtual files 12+ (64 bit, universal)”, from the dropdown menu. The “Virtual files” version allows you to access your Research Drive files without taking up local storage space, which is inevitable for most research scenarios and is a standard practice.
Set up Nextcloud desktop client and sync with Research Drive
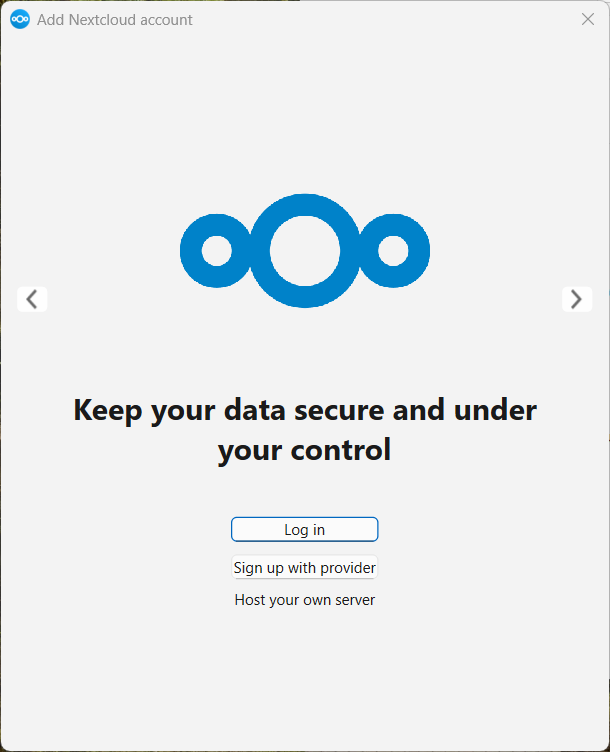
Open Nextcloud once installed and click Log in
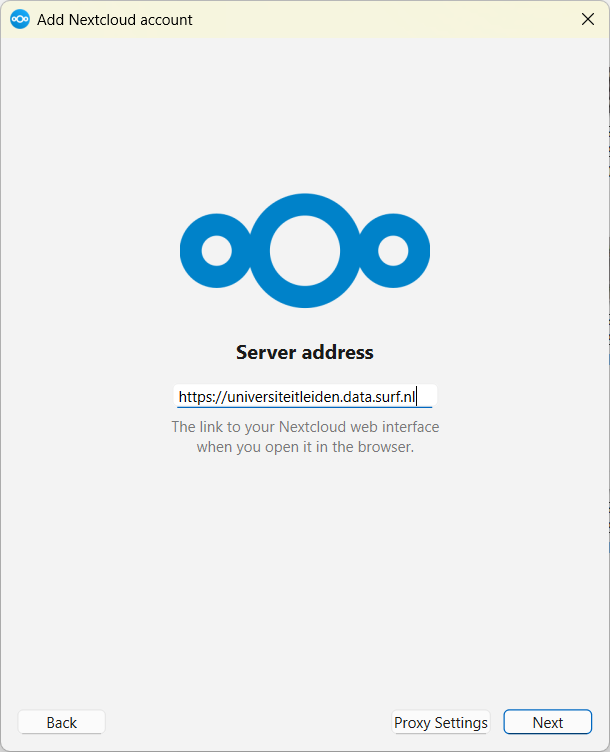
Enter the following URL and click Next
https://universiteitleiden.data.surf.nl
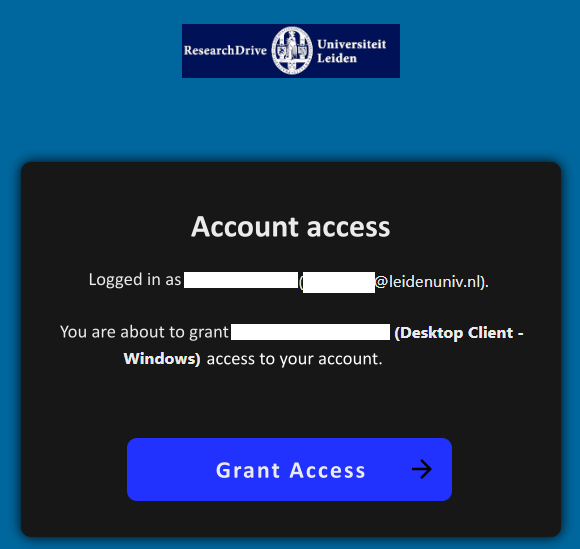
Log in with your ULCN account in the pop-up browser window
Grant access when asked, then close the browser page
Choose a folder to store the data; it must be a new or empty folder. Please make sure to select a folder that is not synced by iCloud, OneDrive, or other services. MacOS users should also avoid using the default “Documents” folder, which is often synced with iCloud and can cause issues. We recommend creating a new folder named “RD” (or similar) directly under your user directory (for example,
C:\Users\<name>\RDon Windows or/Users/<name>/RDon macOS) to ensure it is not affected by other sync services and to minimize path length issues.MacOS users:
You do not need to choose any file or folder to sync, the virtual file system will create a virtual drive for you, and you can access the data via the Finder. You can also choose to sync to a local folder if you prefer, but it is not required.
You will not see “User virtual files …” option.
See Space on your local machine: Virtual files and “Choose what to sync” are mutually exclusive

Click Connect. Sync should start; you can see
 or
or  or
or  in your system tray located on the bottom right (Windows) or top right (macOS). Expand the system tray if needed.
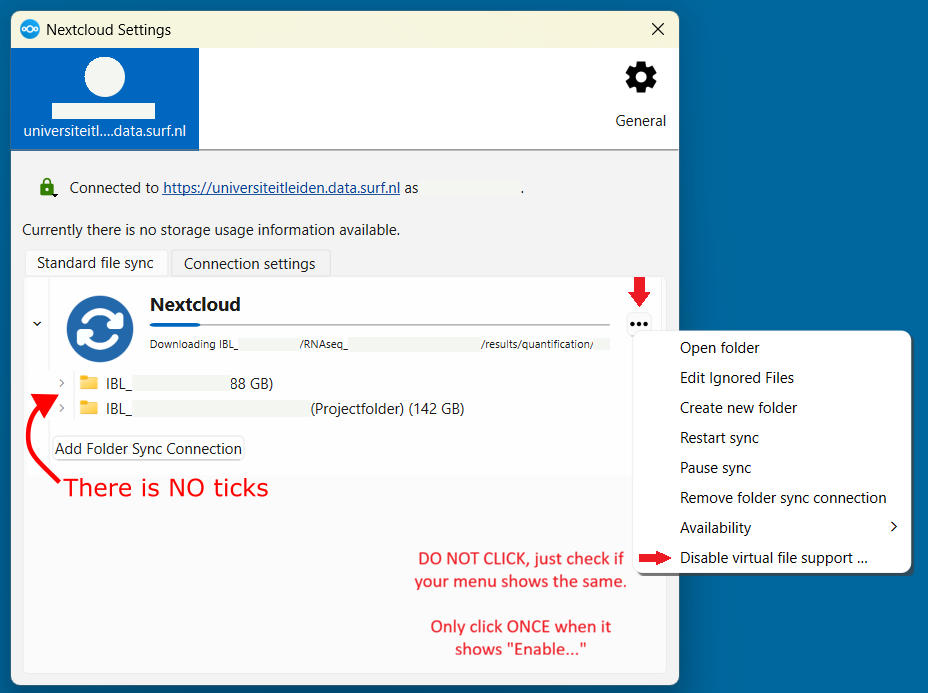
Check your settings:
Right-click the Nextcloud icon
or or in the system tray, then left-click “Settings”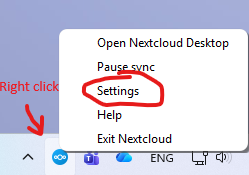
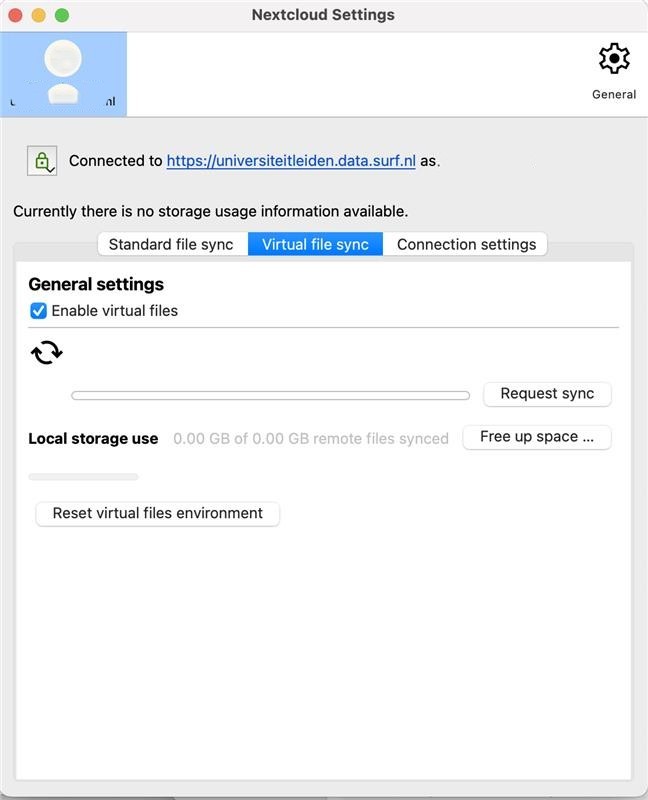
Virtual files enabled
For macOS users, you should see “Virtual files” is enabled by default. If not, you need to uninstall the current Nextcloud client and download the version with “Virtual files” support. For University laptop users, please contact the ISSC helpdesk to request an update to the Nextcloud client with “Virtual files” support.
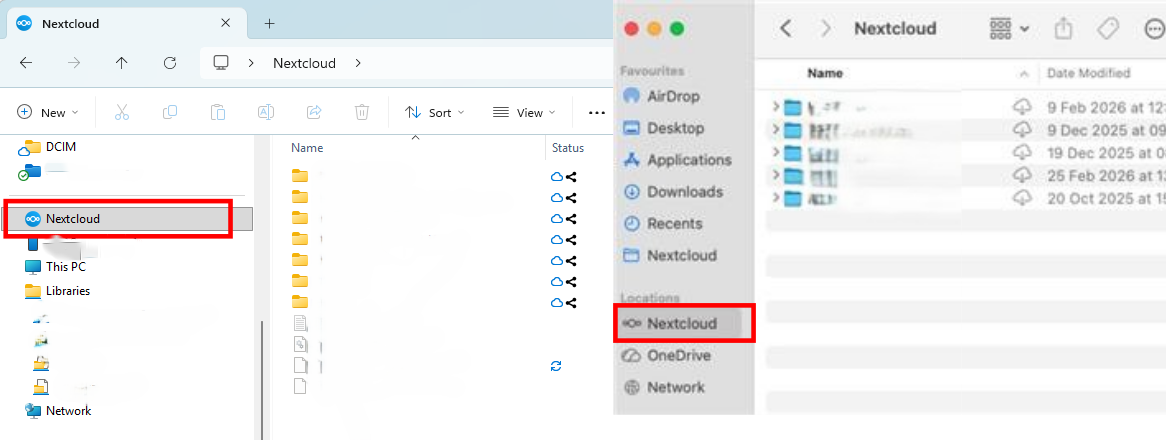
You can access the data via the file browser (Explorer on Windows, Finder on macOS). You should see the cloud icon on the project folder, that icon will change depending on whether the files are cloud-only or downloaded.
Do not add data directly to the top-level Research Drive folder
Unlike OneDrive, you do not own any space in Research Drive — everything is shared with you. When you open Research Drive, the first screen you see (the top-level folder) only shows folders that have been shared with you:
The project folder that belongs to a PI
Any other folder shared with you
Anything you create directly in that top-level folder is not part of Research Drive and will not be synced — it will be lost.
        graph LR
    RD["🗄️ Research Drive (top-level folder — what you see when you open Research Drive)"]
    RD --> P1["📁 ProjectA  ← shared with you ✅"]
    RD --> P2["📁 ProjectB  ← shared with you ✅"]
    RD --> BAD1["❌ 📄 my_file.txt created by yourself  ← NOT synced, will be lost!"]
    RD --> BAD2["❌ 📂 my_folder created by yourself  ← NOT synced, will be lost!"]
    RD --> GOOD1["📄 data.txt shared by others  ← synced ✅"]
    P1 --> GOOD2["📂 subfolder created by yourself inside ProjectA  ← synced ✅"]
    style BAD1 fill:#ffcccc,stroke:#cc0000
    style BAD2 fill:#ffcccc,stroke:#cc0000
    style P1 fill:#ccffcc,stroke:#009900
    style P2 fill:#ccffcc,stroke:#009900
    style GOOD1 fill:#ccffcc,stroke:#009900
    style GOOD2 fill:#ccffcc,stroke:#009900